
I have a fun idea to share with your today. You may have heard of a triangle box and I decided to take advantage of its shape and make it into a Christmas Tree. These perfect treat boxes would be great for your Christmas table at each place setting.

You can fill it with whatever you’d like but you could fill it with a treat, a joke and a party hat and use it instead of a cracker! They are simple to make and take minimal supplies. Let me share the basics with you.
How to make your own Christmas Tree Treat Box
- Cut green cardstock to measure 9 x 21cm (8.5 x 3.5″)
- Score across the centre at 10.5cm (4.25″)
- Mark both short edges at the centre point, 4.5cm (1.75″) with a pencil
- Score 4 diagonal lines from the pencil mark to the centre score line
- Punch out lots of 3/4″ circles from the same green card
- Add double sided tape to the front of your Christmas Tree at approx 1.5cm (1/2″) intervals
- Add a small brown card square overhanging the base of the tree (to represent a trunk)
- Stick your punched circles across the front of your tree overlapping each other slightly
- Fold your diagonal score lines to create the tree shape and reinforce your creases
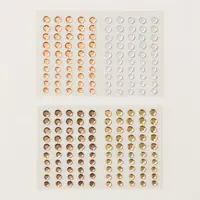
- Decorate your tree with embellishments
- Fold your treat box together and punch two holes and thread ribbon in a bow
- Add a greeting if you wish!

Which one do you prefer? The one with the greeting banner or without? Of course you can make the triangle box to be larger, taller, slimmer to suit the occasion. I have made a few of these in my time, here is a triangle box made with designer series paper, Snow Place Triangle Box.
All the supplies I used are from Stampin’ Up! but you can substitute for any cardstock or embelllishments you have at home.
I hope you give these little Christmas Tree’s a try! You could even hang them from your Christmas Tree!
Thanks for stopping by x


Totally gorgeous!!