• Blog
  • About Me
    • My Achievements
  • Shop Online
    • Paper Pumpkin
  • Specials & Promotions
  • Stampin’ Up! Catalogues
  • Join Our Team
  • Contact me
    • Facebook
    • Instagram
    • Pinterest
    • YouTube

Michelle Last

Papercrafter
Independent UK Stampin' Up!® Demonstrator

Cute Walrus from Stampin’ Up!

July 5, 2019 By Michelle Last

That isn’t something you write everyday is it?  Cute Walrus :). He is darn cute though, he is from the We’ll Walrus Be Friends Stamp set available from my Stampin’ Up! shop.Walrus from Stampin Up

I decided to make a window aperture as if you could see a walrus through the port hole of a boat.

Stampin Up Walrus

How I made this card

  • Emboss a piece of Sahara Sand card stock with the Pinewood Planks embossing folder.
  • Ink over the raised embossing with Gray Granite Ink to add a little depth.
  • Stamp the walrus in memento black ink and colour with Stampin’ Blends.
  • Punch out the walrus with a 2″ circle punch.
  • Die cut a circle from the Layering Circles Framelits in the double layer (with the plank embossing) for the front of the card.
  • Lay in place and draw a pencil line in the circle aperture and cut a circle using the same circle die.
  • Glue the double layer embossed piece to the card front, making sure you line up the apertures.
  • Punch a 2″ circle punch in Silver Foil and then a 2 1/4″ circle around it to create a silver ring.
  • Stick the silver ring around the aperture on the embossed planks piece.
  • Stick the Walrus in place on the inside of the card so that he fits inside the aperture.
  • Add silver metallic pearls or colour regular pearls with Stampin’ Blends and stick to the silver ring to mimic bolts.
  • Stamp and emboss a greeting and stick in place.
  • I used glossy accents to make the Walrus appear shiny/wet.

He is adorable isn’t he?  I have rather fallen for this set.

Stampin Up We'll Walrus be Friends

If you would like your own Walrus set, or any other Stampin Up Supplies for that matter, please pop on over to my online shop to place an order.   Please use the monthly hostess code and if you spend £45 you will be emailed a coupon for £4.50 to spend in August.

All the items I have used are shared below, click any of the photos to go direct to that item in my shop.  Thanks for stopping by.  I am off on the Stampin’ Up! Incentive trip on Sunday.  We are off on a cruise of the Greek Isles.   I promise to share photos on my return.

149367
We’ll Walrus Be Friends Cling Stamp Set – 149367

Price: £20.00

133782
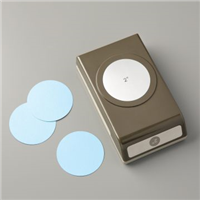
2″ (5.1 Cm) Circle Punch – 133782

Price: £17.00

143720
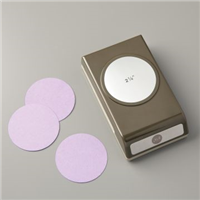
2-1/4″ (5.7 Cm) Circle Punch – 143720

Price: £17.00

141705
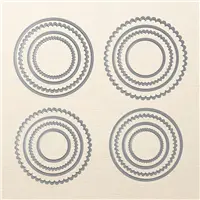
Layering Circles Dies – 141705

Price: £33.00

146282
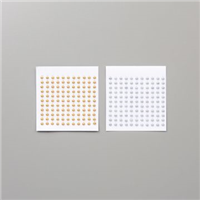
Metallic Pearls – 146282

Price: £6.50

132178
Silver Foil Sheets – 132178

Price: £4.75

Supply List

signature
Shop Stampin' Up!
Request a catalogue
Buy the starter kit
  • Facebook
  • Twitter

Filed Under: General Tagged With: circle punch, Foil Sheets, Layering Circle Framelits, Metallic Pearls, We'll Walrus Be Friends

the PAST
the FUTURE

Comments

  1. LEANNE M PUGLIESE says

    July 5, 2019 at 12:40 pm

    This is super cute!

    • Michelle Last says

      July 5, 2019 at 4:47 pm

      Thanks so much xx

  2. Phyllis Shepherd says

    July 5, 2019 at 12:50 pm

    Precious card Michelle! Excited to see you soon.

    • Michelle Last says

      July 5, 2019 at 4:47 pm

      I’m delighted I’ll be able to hug you very soon x

  3. Deanette Linville says

    July 5, 2019 at 3:36 pm

    That card is adorable! Love what you did with it! Thank you for sharing how you made it! Too cute!

    • Michelle Last says

      July 5, 2019 at 4:48 pm

      My pleasure xx

  4. Annette says

    July 6, 2019 at 6:56 am

    So cute! just love him x

  5. Enid says

    July 6, 2019 at 10:37 am

    Brilliant idea of a cute card and instructions to make.x

  6. Karen Goodfellow says

    July 25, 2019 at 3:32 am

    Your card is SO cute, Michelle! What do you mean when you said “in the double layer”?
    ‘…Die cut a circle from the Layering Circles Framelits in the double layer (with the plank embossing) for the front of the card.’

    • Michelle Last says

      July 29, 2019 at 3:43 pm

      Hi Karen, I just meant that the Sahara Sand embossed piece of card stock was layered on a piece of Soft Sea Foam cardstock to create a mat and that you are to die cut a circle through both pieces of cardstock at the same time. I hope that makes sense x

request a
catalogue
click here
classes
and events
classes and tutorials
shop now
special
offers
view
place an
order
More information

Paper Pumpkin

SUBSCRIBE

Search My Blog

Archives

Join my Newsletter

Ideas • Inspiration • Offers
Receive my regular newsletter which includes all the latest news, events, special offers and promotions
CLICK HERE TO READ MY PRIVACY POLICY

Important Links

  • Home
  • Blog
  • About Me
  • My Achievements
  • Shop Online
  • Stampin’ Up! Catalogues
  • Join our Team
  • Classes & Tutorials
  • Contact me
  • Privacy Notice
Michelle Last
about me
my achievements
  • Facebook
  • Instagram
  • Pinterest
  • YouTube

Subscribe to Blog via Email

Enter your email address to subscribe to this blog and receive notifications of new posts by email.

Join 5,764 other subscribers

michellelastcreative

Helping you create handmade cards & scrapbook pages.
Independent Stampin' Up! Demonstrator 🇬🇧
• Inspiration • Classes • Shop • Catalogue • Join

I’m so happy to share that my Christmas Organiser I’m so happy to share that my Christmas Organiser Tin Kit is now available to purchase!

I’ve loved designing this project and putting everything together for you, and I’m so excited that you can now make your very own Christmas Organiser.

The kit contains everything you need to create the project, along with full printed instructions to guide you through each step.

I think this would make such a lovely project to enjoy in the run-up to Christmas, as well as a beautiful way to keep all those Christmas lists, plans and important little details organised in one place.

Comment ‘Tin’ and I’ll send you the link. 

*Kit available to UK residents only, limited supply available.
#christmasorganiser #michellelast #christmaskit #syampinupuk
Create Beautiful Pop Up Cards with Tile Garden Bun Create Beautiful Pop Up Cards with Tile Garden Bundle

It’s catalogue launch day and I have a pretty pop up card to share with you using one of the lovely new bundles from the Stampin’ Up! catalogue. The Tile Garden Bundle caught my eye straight away. I love its gentle prettiness and all those lovely little floral details. Although I made mine as a birthday card, this style of pop up card could easily be adapted for thank you's, Christmas, congratulations or lots of other occasions....

https://www.michellelast.co.uk/stampin-up-tiel-garden-pop-up-card/
I am thrilled to have been asked to be part of the I am thrilled to have been asked to be part of the Paper Pumpkin Creatives team.  There is a line of 20 talented demos from across the globe who are here to inspire you to make alternative projects with your Paper Pumpkin kit and I wanted to take a moment to introduce you to all the amazing designers….

If you signup with me and order your Paper Pumpkin Kit, you’ll receive the free tutorial bundle with at least 16 projects ideas with full instructions each month.

You can purchase the tutorial bundle for $20 and be totally inspired by all the beautiful projects.

You can find out more here - https://www.michellelast.co.uk/paper-pumpkin-creatives.../

Or comment below if you’d like me to send you the link. #paperpumpkin #paperpumpkincreatives #designteam
Paper Pumpkin Creatives Tutorial Bundle I have so Paper Pumpkin Creatives Tutorial Bundle

I have some exciting news to share! I'm delighted to have joined the talented Paper Pumpkin Creatives Design Team, a wonderful group of demonstrators from around the world who create exclusive tutorials each month to help you get even more from your Paper Pumpkin kits. What is Paper Pumpkin? As Paper Pumpkin is new to the European market, you may not be familiar with it, so let me explain....

https://www.michellelast.co.uk/paper-pumpkin-creatives-tutorial-bundle/
I have been busy creating this interactive mini al I have been busy creating this interactive mini album for my team retreat and I wanted to show you the inside. I made it using all Stampin’ Up supplies and it’s been a joy watching my team create their own album and all the different variations. It’s such a great way to showcase all your favourite photos in one album that makes you smile every time you flick through the pages. 

I’ve shared a slowed down version on YouTube and stills for n my blog. Just leave me a comment and I’ll send the links.

Let me know what you think x
#minialbum #interactiveminialbum #stampinup #scrapbooking #memorykeeping
Interactive Mini Album I've been busy behind the Interactive Mini Album

I've been busy behind the scenes creating a special mini album for my team retreat this weekend. I can't wait to spend time with my wonderful team—being creative together, sharing lots of laughs and making this beautiful keepsake. If you've followed me for a while, you'll know I have a real love for mini albums. They're one of my favourite ways to preserve memories because they tell a story that's far bigger than a single scrapbook page....

https://www.michellelast.co.uk/interactive-mini-album/
Follow on Instagram

Copyright © 2026 · Michelle Last· Hello You Designs

All content on this blog is the property of Michelle Last, Stampin' Up!® Independent Demonstrator. Classes, services and projects offered here are not endorsed by Stampin' Up!® Projects, videos, photos, ideas and articles are shared for personal use only and may not be removed, duplicated or copied without permission

Theme customisation and website maintained by Catherine Carroll
Craftbox Design Ltd. Registered Office: 32 Llys Edmund Prys, St Asaph Business Park, St Asaph, LL17 0JA
Registered in England No. : 06692729 VAT registered: 942 2971 13